The Dark Sky API was recently shutdown by Apple, who acquired the iOS app and API a couple of years ago.
Working with the new API from Apple, WeatherKit, may be easy in Swift, but is more complex due to the introduction of JWT for authentication and the use of Apple developer credentials.
Here is how I was able to get the REST API working for my Rails app, using the Tenkit gem
bundle add tenkit
Credentials
in config/initializers/tenkit.rb:
Tenkit.configure do |c|
  c.team_id = Rails.application.credentials.tenkit[:apple_developer_team_id]
  c.service_id = Rails.application.credentials.tenkit[:apple_developer_service_id]
  c.key_id = Rails.application.credentials.tenkit[:apple_developer_key_id]
  c.key =  Rails.application.credentials.tenkit[:apple_developer_private_key]
end
The credentials needed to construct a JWT (done for us by the Tenkit gem) are gathered from your Apple Developer account. I’d recommend putting them in the Rails app credentials (as used above), or ENV variables if that is more convenient for your project.
Below, we’ll gather the values needed, then display them in the credentials file.
Gathering
apple_developer_team_id - This is your Apple Team ID, taken from the top-right of your developer account page:

apple_developer_service_id - This is a Service ID that you’ll need to create:
https://developer.apple.com/account/resources/identifiers/list/serviceId
It will be in the same style as an App ID, as a reverse domain name, e.g. “uk.co.cowlibob.fancypantsweather”
apple_developer_key_id - Generate a new key:
https://developer.apple.com/account/resources/authkeys/add
Give it a name (not important but descriptive to you) and make sure to check “WeatherKit”
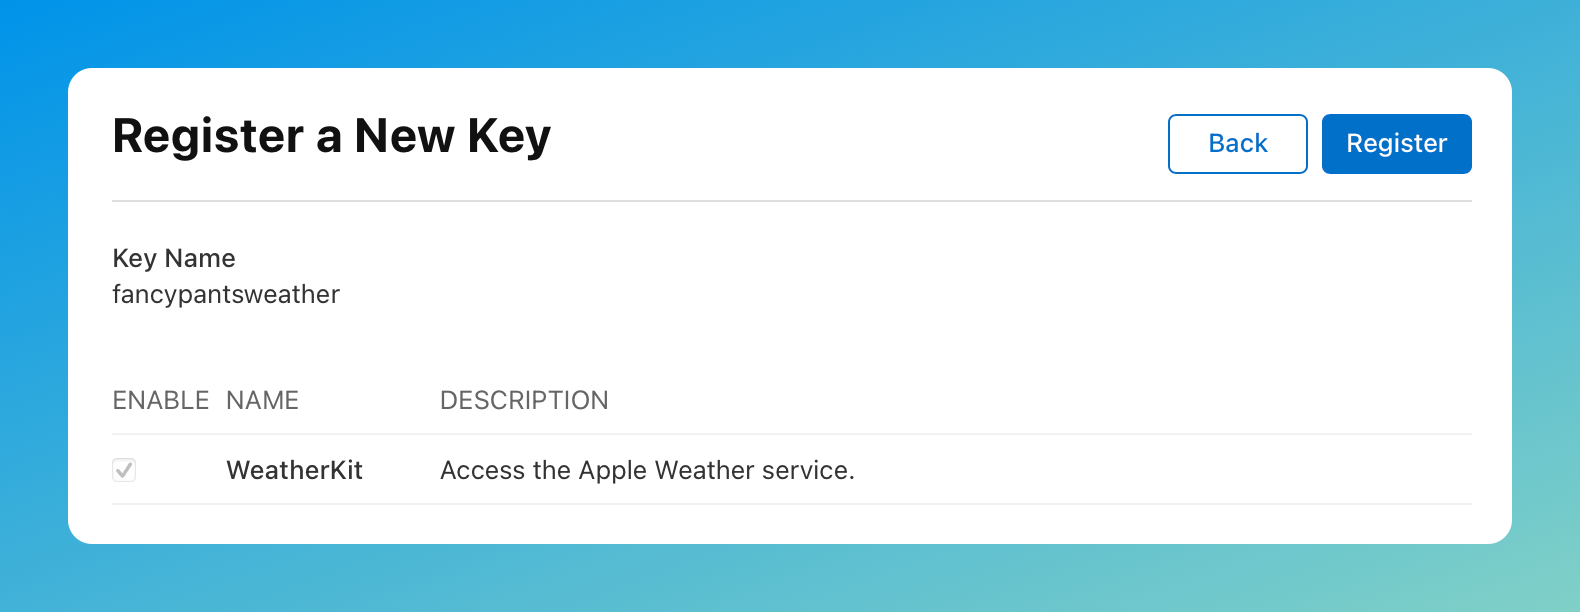
Make sure you download the key and keep it safe for the next credential.
Use the generated Key ID as the value for apple_developer_key_id.
apple_developer_private_key - This is the freshly downloaded private key, a .p8 file. P8 is a format that presents the private key in plain text (.p12 is a binary format). You may have seen these before, they look something like this:
-----BEGIN PRIVATE KEY-----
AAAAAAAAAAAAAAAAAAAAAAAAAAAAAAAAAAAAAAAAAAAAAAAAAAAAAAAAAAAAAAAA
AAAAAAAAAAAAAAAAAAAAAAAAAAAAAAAAAAAAAAAAAAAAAAAAAAAAAAAAAAAAAAAA
AAAAAAAAAAAAAAAAAAAAAAAAAAAAAAAAAAAAAAAAAAAAAAAAAAAAAAAAAAAAAAAA
AAAAAAAA
-----END PRIVATE KEY-----
Configuring the credentials
You can now open the credentials file for edit and add these. I use vim to edit these, as specified by the env variable EDITOR. We can use the | symbol to start a block of text in the YAML file, much like a heredoc in Ruby.
> rails credentials:edit --environment development
# aws:
#   access_key_id: 123
#   secret_access_key: 345
tenkit:
  apple_developer_team_id: 'A11AA1AAA1'
  apple_developer_service_id: 'uk.co.cowlibob.fancypantsweather'
  apple_developer_private_key: |
    -----BEGIN PRIVATE KEY-----
    AAAAAAAAAAAAAAAAAAAAAAAAAAAAAAAAAAAAAAAAAAAAAAAAAAAAAAAAAAAAAAAA
    AAAAAAAAAAAAAAAAAAAAAAAAAAAAAAAAAAAAAAAAAAAAAAAAAAAAAAAAAAAAAAAA
    AAAAAAAAAAAAAAAAAAAAAAAAAAAAAAAAAAAAAAAAAAAAAAAAAAAAAAAAAAAAAAAA
    AAAAAAAA
    -----END PRIVATE KEY-----
  apple_developer_key_id: 'BBB11BBBBB'
Making a request
client = Tenkit::Client.new
lat = "53.4138684"
lon = "-1.5833708"

report = client.weather(
  lat,
  lon,
  data_sets: [:forecast_hourly]
)

ap report.weather.forecast_hourly.hours
That’s all there is to it once setup. You can also request multiple and different data sets. There are some undocumented features of the API such as date ranges that I’ll detail in a future post. For now, this is what the Tenkit gem supports.